Last week, we rushed through creating a newsletter.
This week we’ll
highlight some of the other features on Mailchimp. Again, there are so many
things you can do with Mailchimp. I can’t possibly get to them all.
Templates
It’s
a great idea to create a template for your monthly, quarterly, weekly
newsletter. (Though if you are weekly, you don’t need me.) A template of your
newsletter with your layout, logo, links, and other data already added makes it
even easier to send out. A few clicks versus building an entire layout. Click
on Email template and choose one that will work for most of your newsletters.
Click on the top box to enter your logo, banner, or standard picture. Click on
the social media tags and add all your links. (This is the best part of a
template—not having to find all those links.) Don’t worry about the info at the
bottom of the template. When you create a campaign, Mailchimp will
automatically add that data (address, email, etc.).
Segments
Find Segments under the Audience menu. This allows
you to divide your customer list based on their interests, ages, location, etc.
You can split up your audience to target them better. Click on Create a
Segment. Next choose which audience members and what criteria to use. Choose
Any or All contacts that match the criteria including Date Added, Sign up Source,
and Campaign activity. You can segment your audience in many other ways. Each
criterion for division has different choices. If you click by Date Added and
choose After the Last Campaign was sent, you can send just the newest members
of your contact list a message. Maybe a personal welcome note or a lead magnet
(a freebie like digital content). We’d
have another eighteen-page post if I went through all the options for segments,
but questions you ask from your landing page/sign up can determine how you can
segment. Hit the Add button to narrow the field further with more criteria.
Once complete, hit Preview Segment to see the subscribers who meet your
request. Click Save Segment or go back and revise. You can also send a campaign
for email or postcards right there. You can export the segment into a CSV file
for backup.
Webpages
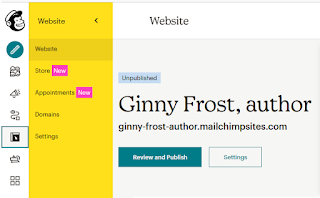
Click on the Webpage option on the left-hand menu.
Choose how you wish to start—Design, Selling, or Services. I’m starting with Design as I’m
not planning to sell books or services from my site. Choose a name for your
webpage and click Edit My Site. Click on Edit Page to design the elements. Like
the newsletter creator, the webpage creator allows you to click on elements on
the page and edit them. Uploading your images is easy. Text and images are
edited on the right, similar to the newsletter. Each pre-made element can be
edited to add data, such as the buttons. Click on a button to add a link. On
the bottom right is the Sections menu to speedily get you to a section to edit.
Just click on your choice.
Back on the management page, other options include
Style that has various color schemes for text and backgrounds. The cookie
manager puts a disclaimer about how cookies work and lets the viewer know you are using them. It’s important if you
are using a Pixel to let people know you are gathering information. Like WordPress,
Mailchimp will host the site with their name in your domain name. Having your
newsletter, mailings, marketing, and website all in one place can be super
convenient.
As I write this,
I see Mailchimp has a major announcement coming. If it counteracts anything
from the last two posts, I’ll
give you all an update.
 Ginny Frost