How to Use Aeon
Timeline
Timeline
To begin, get
familiar with Aeon Timeline’s vocabulary.
familiar with Aeon Timeline’s vocabulary.
Entity—people,
locations, story arcs, projects, etc. associated with events
locations, story arcs, projects, etc. associated with events
Event—an
occurrence on the timeline
occurrence on the timeline
Relationship—a
connection between an Entity and an Event
connection between an Entity and an Event
Group—a
set of entities based on their relationship
set of entities based on their relationship
Aeon Timeline allows
a user to jump in right away in creating a project. No pre-planning necessary,
as the program can change and adapt elements as the project changes.
a user to jump in right away in creating a project. No pre-planning necessary,
as the program can change and adapt elements as the project changes.
The following
directions are for writing a fiction novel, novella, or short story.
directions are for writing a fiction novel, novella, or short story.
Starting a project
- Select a Template.
- Click Choose or
Customize. Each template had unique entities and options. - The blank screen
will appear with dates across the top and bottom. Scroll to your time period.
Adding
Entities
Entities
Characters
I recommend adding
Characters (Entities) before Events. In the long run, it saves time. Characters
are easy to drop into events.
Characters (Entities) before Events. In the long run, it saves time. Characters
are easy to drop into events.
- Click on the Add
Entity icon (a head with a plus sign and down arrow). - Add Character.
- In the new
window, add a name and birthdate for the character. (And death date if you have
one.) - Follow the above
steps to add each character.
Story Arcs
- Click on the Add
Entity and choose Add Arc. - Add in story arcs
to track events. (His internal conflict, her external conflict, etc.)
Setting
- Click on Add
Entity and choose Add Place. - Type the name of setting
locations for events. These can be added as details for events.
Events
Adding Events.
- Double-click on
the date of the Event. - In the pop-up window,
title the Event. - Choose a color for
the Event to link it to other Events. - Select a time
frame for the Event. - Click on the
small green plus sign to add Participants in the Event (characters). - Click on the
small green plus sign to add Observers to the Event. - Follow the same
steps to add locations and Arc information.
Editing Events
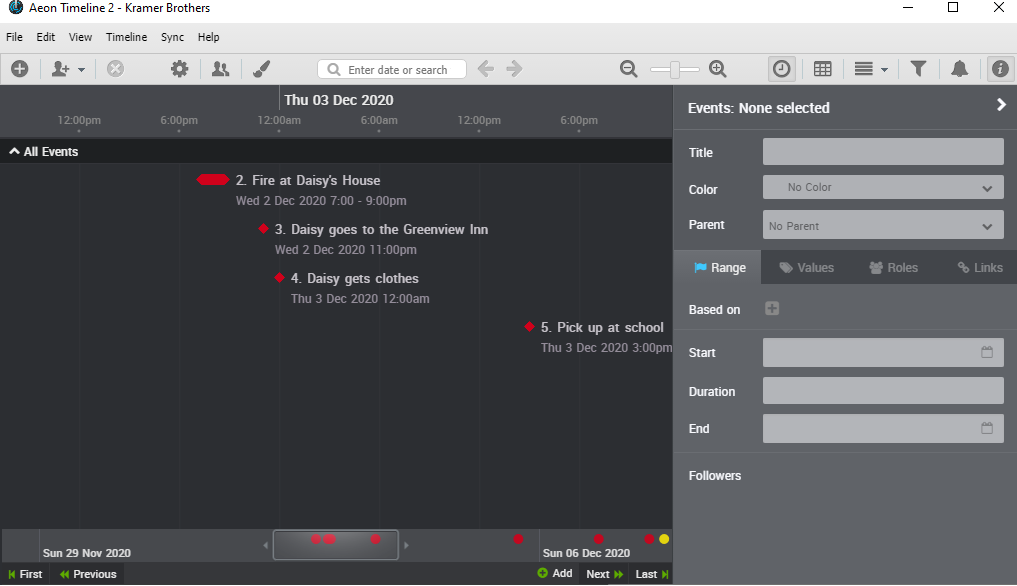
- Click on the
Event. On the right-hand side of the screen, details of the Event will appear.
o
Range: Add a duration time for the Event. (Days,
hours, seconds)
Range: Add a duration time for the Event. (Days,
hours, seconds)
o
Values: Add a summary to the Event.
Values: Add a summary to the Event.
o
Roles: Manage character (Entity) roles in the
Event.
Roles: Manage character (Entity) roles in the
Event.
o
Links: Add external links to research, images,
etc.
Links: Add external links to research, images,
etc.
Other ways to
Edit/View Events
Edit/View Events
- Click on Event
and drag to a new start time. - Press Alt on the
keyboard and click and drag the Event to change the end duration. - Click on the Zoom
at the top of the page. Drag the slide to move on the timeline. - Use the bottom
slider to move up and down the timeline.
Timeline
Settings
- Click the
Settings icon on the left side of the page.
o
Range—Choose the type of date and length of zoom.
Range—Choose the type of date and length of zoom.
o
Properties—Adjust tension, completion and
summary fields. Click the green plus to add more fields.
Properties—Adjust tension, completion and
summary fields. Click the green plus to add more fields.
o
Entity Types—Adjust fields/icons for characters,
arcs, and locations. Add more with the green plus.
Entity Types—Adjust fields/icons for characters,
arcs, and locations. Add more with the green plus.
o
Colors—Add labels to colors. Double-click on
color for more choices.
Colors—Add labels to colors. Double-click on
color for more choices.
All changes can
be saved as a custom template by clicking the button at the bottom of the
screen.
be saved as a custom template by clicking the button at the bottom of the
screen.
These
instructions will get a project started. Aeon Timeline is a powerful and
sophisticated program. The more you use it, the more you will learn. Watch the
tutorial videos on their website (link). They are easy to follow and infinitely
helpful.
instructions will get a project started. Aeon Timeline is a powerful and
sophisticated program. The more you use it, the more you will learn. Watch the
tutorial videos on their website (link). They are easy to follow and infinitely
helpful.
 Ginny Frost