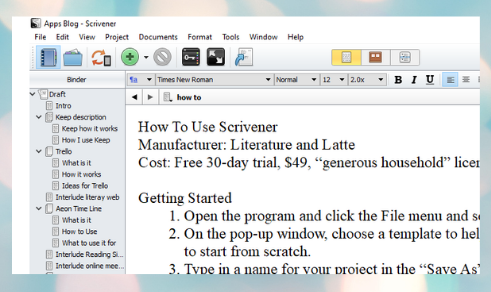
Manufacturer:
Literature and Latte
Cost: Free 30-day
trial, $49, with a “generous household” license
Getting Started
- Open the program and click the File menu and
select New. - On the pop-up window, choose a template to help
you create your novel or choose Blank to start from scratch. - Type in a name for your project in the “Save As”
field and press Create.
Navigating
Scrivener
- ·
Your Binder—the left side of the screen
o
Draft—a place to see the entire novel on a story
board
o
Untitled—a page in the novel
o
Research—save any research docs, webpages,
pictures
o
Trash—place to hold those hidden gems or just
trash
- · Center Screen—the work area
o
View
Document—Click to see the page
o
View
Corkboard—View doc and all sub docs in one spot
o
View
Outline—Click to view outline of doc
Setting Project
Statistics
- Click on the Project menu and select Project
Targets. A small pop-up window will appear. - Type in the total number of word you expect for
this project in the field below Draft Target. Scrivener will keep this number
for the entire project. - Type an estimated word count for this writing
session in the second field at the bottom of the box. Watch the bar turn from
red to green as you reach your goal. - Click and drag this window to the side of the
screen. You can keep it open for your whole session to track your words. Or
click the X to close it.
Adding Text/Folders
- Press the little arrow next to the Add Text
button (small gree plus). - Select Folder or Text.
- Name folder or text. (Double-click on Untitled
if object is not highlighted.)
- ·
Tip: add a folder with a blank text doc. Label
the folder “Cuts” or “Edits”
Moving
Text/Folders
- ·
Click add drag desired object up or down the
list in the binder.
Working with Text
- Set up your chapters and scenes.
- Click on the first Untitled doc to create Scene
1. - At the top of the screen, select your font, font
size, and spacing. This is NOT the final look of your doc. This is solely for
your own writing style.
Using the
Inspector Feature
- Press the Inspector window button (small blue i) at the top right of the
screen. A window down the right side of the screen will appear. (Use this
feature for both scenes and chapters.) - Type in a synopsis for the chapter or scene at
the top. - Add metadata to your scene/chapter including
content type, characters included (if you use that template), draft status, and
inclusion of this part in the end Compile of the doc. - Type notes in the Document Notes section of the
Inspector to makes comments on work, add a picture or whatever you need to keep
writing.
These
are the basics of the program. Using other features such as the Cork Board,
Outline, or Script mode, you can design your doc in many ways. But I think for
Scrivener, it’s best to start with the basics, and get a good working knowledge
before trying the tougher aspects.
 Ginny Frost